I really enjoyed this weeks assignment! I had so many individuals willingly take time our of their day to help me out. I was really excited how most of the photos turned out, and I can’t wait to keep showing off what I do best. It’s amazing the wide variety of portraits you can capture.
Portraits
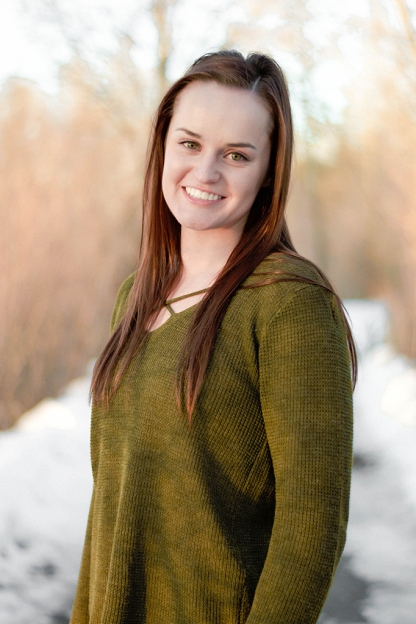
Individual- Side Composition: This photo is taken of my gorgeous cousin Raquel. I used levels and curves to get the right coloring in the photo and to give it a more matte film look. I then brightened up her eyes with dodge, and darkened up the colors in her hair with burn.

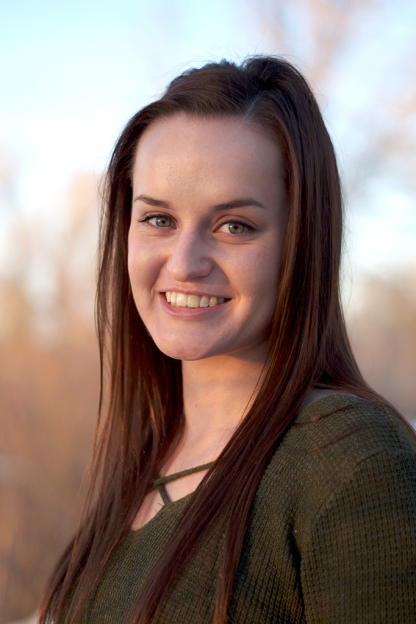
Individual- Head or Head and Shoulders: This is a portrait of my old roommate and really good friend Savannah. We went out to Nature Park just around 5:00 and began to get really nice natural lighting. I brought the photo into Photoshop and briefly touched of a few things, included white balance, and levels.
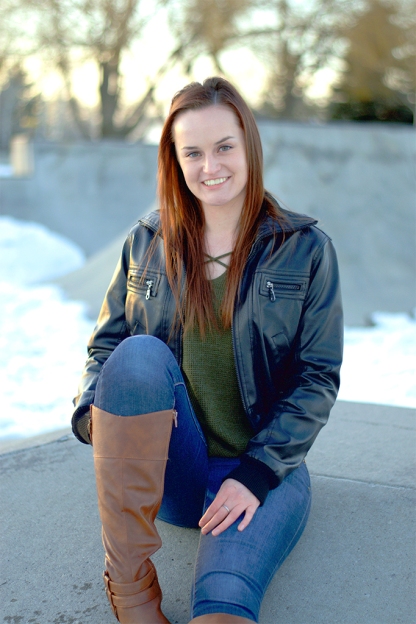
Individual- Full Body: This is also another picture of Savannah taken in Nature Park. I wanted to do a more serious posed photo, so we found some steps at the skate park and I posed her. After the shot was taken I went into photoshop, I straightened and cropped the photo, then used levels, curves, and dodge and burn. I contoured her face to make it look more fierce.

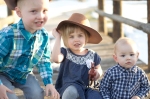
Group Activity- Candid: Since I had already asked my cousin to pose for portraits, she wanted me to snap some quick family photos. This is a photo of her two little boys, I caught them staring at each other and smiling, I couldn’t help but use it for a candid shot! When the photo was taken it was a little overexposed, so I went into photoshop and played with levels until I got a nice medium contrast/color. I then sharpened up the faces of the two boys using an unsharp mask.

Group Posed- Two or More People: My cousin insisted that I take an actual good photo of her and her husband because they hadn’t had a good one in years! Her and I worked equally in coming up with a pose that would both be loving and adorable. After the photo was taken I used photoshop and messed with levels and curves.

Environmental- Individual: This is a picture I snapped of my husband Robert playing his computer games. I thought it would come out a lot better than it did, which is why I went into photoshop and turned it black and white. I initially wanted the photo to be a more faded black and white, but thought it looked better darker.

Portrait Enhancements: I chose another photo of Savannah for the portrait enhancement. The before photo was really good but I just thought it needed a little bit more adjustments. I did most of my adjustments in Lightroom but used photoshop as well. I first went in and added a preset, which helps with exposure, coloring, highlights, and more. I then went in and changed the color of her shirt to make it match. Then I went into photoshop to whiten her teeth and remove blemished and lines from her face and neck. I also went in with dodge and burn to add contouring to her face and darkened her eyebrows.

Color Match: I also used a picture of Savannah for this one, we took a lot of pictures and they all look different. I used the photo of Raquel because it had good light and color matched it with the original photo because it was really dark. The match didn’t go completely well, for Savannah’s hair is red and her teeth a little grey, but ooverall it was an amazing process!

Color Replace: I used a picture of my cousin’s kids. I decided to change the color of Becca’s dress to a light purple/grey color. It was easiest for her because she was wearing a solid color so it was able to pain on better. I also cropped the photo, because one of the kids was blurry, and I brightened up Becca and Remy’s eyes.